


Table of contents:
How to set up a podcast studio
Step 1: Choosing a room for a podcast studio
Step 2: Soundproofing and sound-treating your studio
Step 3: Getting your podcast studio equipment essentials
Step 5: Pick a podcasting software for recording and editing
Considerations for different podcasting setups
Recording a podcast at home is easier than you think, no matter your budget. Once your gear is set up, you can forget about studio bookings and record from the comfort of your own space.
I’m Stephen Robles, and after more than 10 years of podcasting, I’ll show you step by step how to build a home studio. From choosing the right room and treating the sound, to picking the best gear, this guide covers everything you need to get started
How to set up a podcast studio
My podcast studio setup is quite simple. Let’s start with the basics.
Step 1: Choosing a room for a podcast studio
Before considering any equipment, your first decision is choosing your recording space. The room you record in has the single biggest impact on your audio quality.
If you’ve only got one spare room, then go with that; it’ll be just fine. But, if you have the choice, the ideal home recording studio will be:
- As small as possible to minimize echo.
- Any shape except for perfectly square. The parallel walls can create standing waves that generate unnatural sounds. A rectangular room is a better choice.
- With no walls that are external or joined to your neighbor’s house.
- With as few windows as possible.
- Without appliances that may occasionally make unwelcome noises (a boiler, an air conditioner, a fridge, a dishwasher, etc.).
- With no hard, reflective surfaces like tiles, ceramics, glass, or metal (like a bathroom or a sink).
- Filled with carpeted floors and soft furnishings like tents and pillows.
In other words, a walk-in closet filled with clothes is often the perfect starter studio, but a spare bedroom or a well-furnished living room may also do. Just make sure not to record in a bathroom, a kitchen, or a large, empty warehouse!
Read more in our guide on the best places to record at home.
Step 2: Soundproofing and sound-treating your studio
When recording, your microphone can’t distinguish between your voice and the sound of your voice bouncing off the walls. The goal is to maximize the direct sound from your mouth while minimizing echo and reverb from the room’s surfaces.
To do this, you’ll need to understand soundproofing and sound treatment.
What’s the difference between soundproofing and sound-treating?
Soundproofing means isolating a room completely (or as much as you can) from any external sound.
Here, you’d use heavy, dense building material and seal up any air gaps in windows or doors. It’s expensive, complicated, and usually not necessary for a home podcast studio.
Sound or acoustic treatment means controlling sound inside your studio. It’s about improving acoustics and preventing unwanted sound reflection.
A room with lots of soft and furnished surfaces will prevent excessive reverb or echo, so it’s already sound treated (to a degree).
For podcasting, your priority should be sound treatment. It has a much bigger impact on your recording quality and is far more affordable.
How to soundproof your podcast studio
Full soundproofing is a major house renovation project, and definitely beyond your scope and needs of podcasting. Instead, you can reduce unwanted external sounds to prevent background noise.
Here’s what works for me:
- Turn off any sources of noise in the room, like fans, air conditioners, or heaters, before you hit record.
- If your computer has a loud fan, try to move it into a closet or in another room during recording.
- Choose a room that's naturally quiet and away from street traffic or noisy neighbors.
- Place a rolled-up towel at the bottom of your door to block drafts or noise from other parts of the house.
How to sound treat your podcast studio
Sound treatment for a podcast studio primarily focuses on absorbing sound waves, to prevent them from bouncing around the room and creating echo.
I focus on three main elements to sound treat my studio:
Acoustic panels
These foam tiles are mounted on walls to absorb mid- and high-frequency reflections. Beware, though: they can become expensive. You can wind up needing a lot more tiles than you initially thought.
Auralex SonoFlat Panels: $160.99 (box of 14 sq ft)
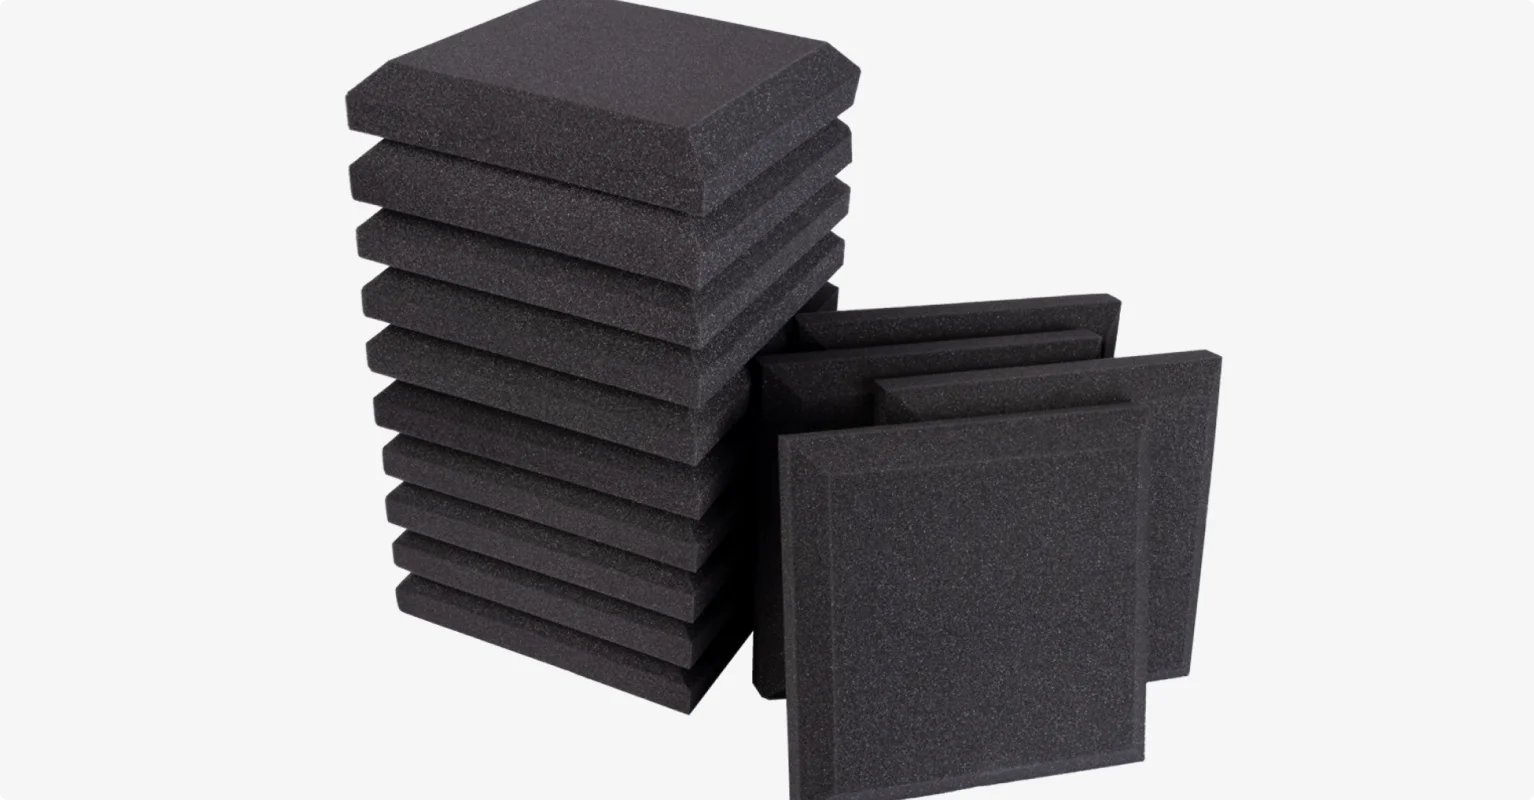
Some of them can be detached from your walls, if you want. You can find temporary, semi-permanent, and permanent options.
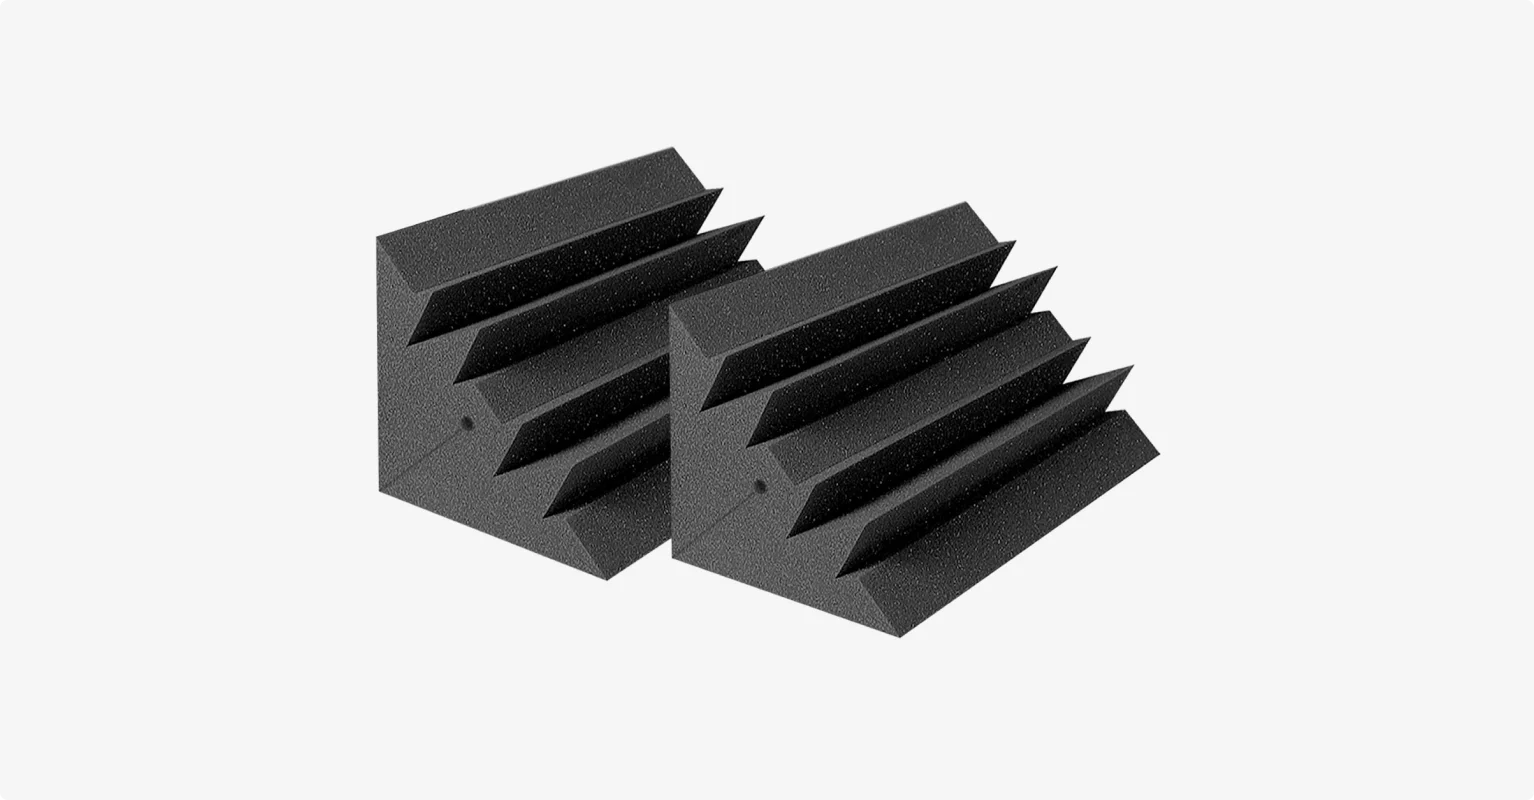
Bass Traps
Bass traps are placed in the corners of a room where low-frequency sounds tend to accumulate. They are thick enough to absorb them.
Auralex LENRD Bass Traps: $191.99 (4 pack)
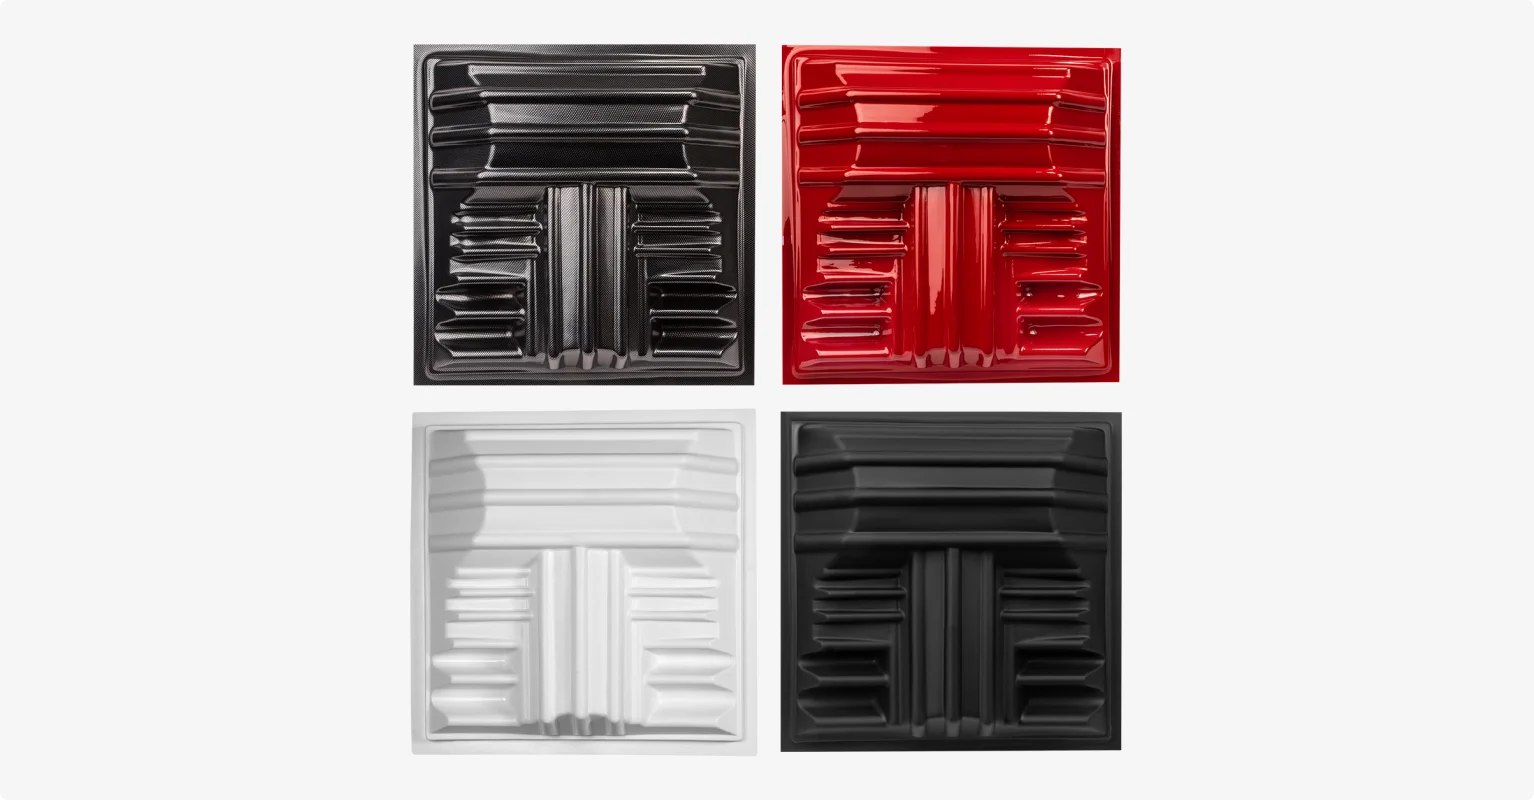
Diffusers
According to some schools of thought, absorption works best if you also include diffusers that hang from the ceiling. Diffusers scatter reflected sound, preserving the natural tone and creating a sense of liveness. Others would argue that they aren’t strictly necessary for a home studio setup or a spoken-word podcast.
T’Fusor 3D Sound Diffuser: $37.99 (single)
Budget-friendly DIY sound treatment
If you have no budget to sound treat your studio, here are some surprisingly effective DIY solutions:
- Vertical sound treatment: Cover as much bare wall space as you can with soft materials. Heavy curtains work best, but thick blankets or duvets hung on curtain rods (or even nails) can do the job. A bookshelf filled with books doubles as a natural diffuser and absorber.
- Horizontal sound treatment: Fill the space with soft furniture. Couches, upholstered chairs, pillows, and area rugs all help soak up sound reflections. The more soft surfaces will cover the floor, the cleaner your audio will be.
Step-by-step sound treating your home recording studio:
- Place the bass traps in the trihedral corners (see picture).
- Place the acoustic panels across the dihedral corners (see picture).
- Place the other acoustic panels on the walls and space evenly around the room, especially on the walls directly facing your microphone.
- If you do choose to purchase diffusers, mount them high on the wall or near the ceiling to break up sound waves without deadening the room too much.

Step 3: Getting your podcast studio equipment essentials
When it comes to podcast equipment, bigger isn’t necessarily better, and there’s no need to spend too much on it. If you don’t go too cheap, it’s absolutely possible to deliver optimal quality with a minimal setup.
Disclaimer: Please see our help site guidelines to check the compatibility of any equipment with Riverside.
Recording device
If you’re on a budget or you’re happy with what you have, stick with your current computer or laptop. You can also use a mobile device.
But if you have a bigger budget, consider investing in a more up-to-date model. Prioritize a fast processing speed and sufficient storage capacity.
Here are my top picks:
Microphones
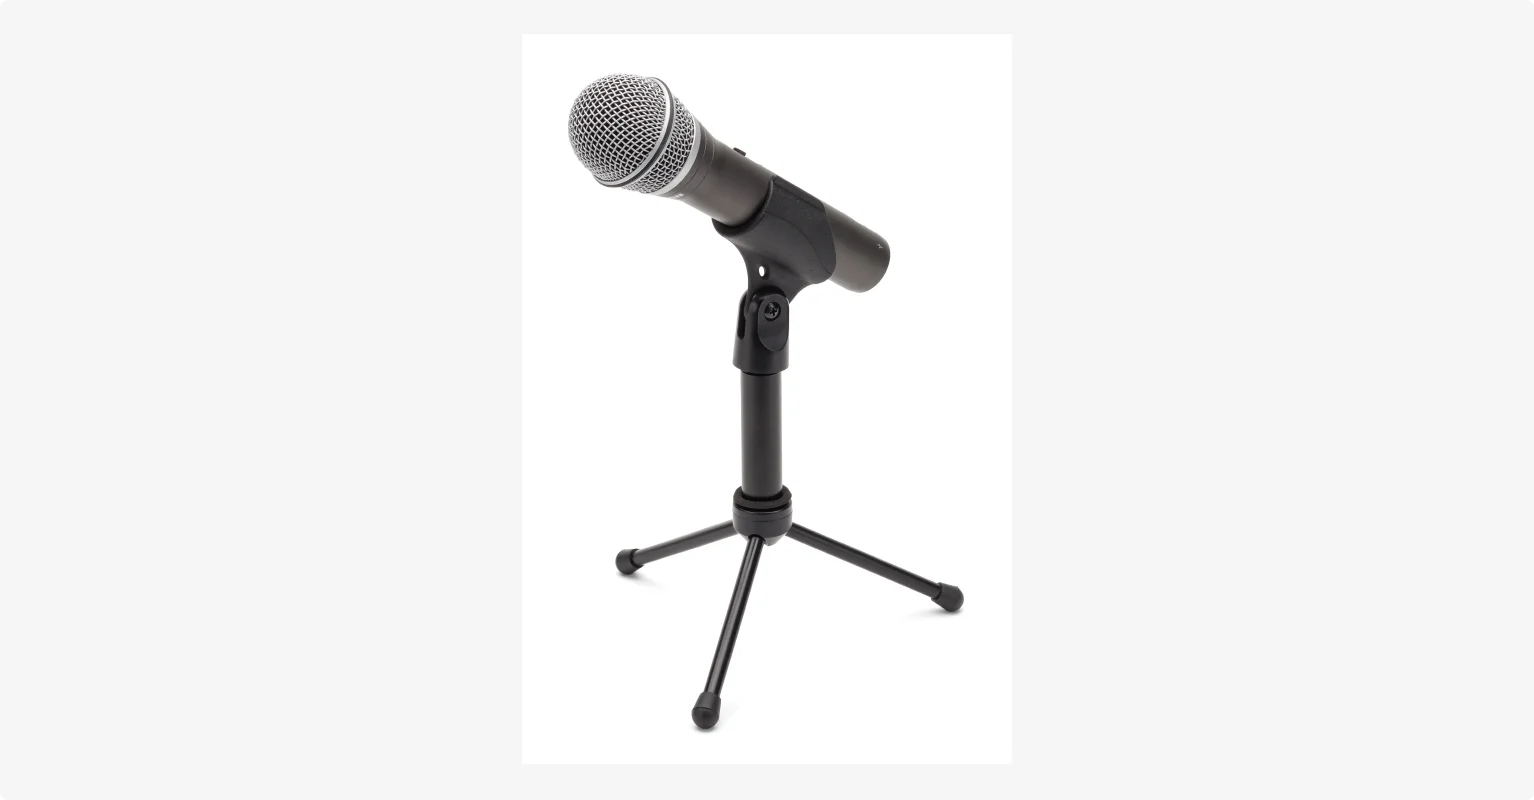
Your microphone is the most important piece of gear for capturing your voice in the best quality possible.
Keep in mind that price is not always directly correlated to the quality of the microphone. I’ve tested budget mics that sounded amazing, and expensive ones that didn’t fit my voice or setup.
To understand what you need, let’s start with the basics of how mics works. There are two types of microphones: cardioid and condenser, and two types of connectors: XLR and USB.
Here’s a quick recap of their potential advantages and disadvantages:
- Dynamic microphones are less sensitive in picking up sound. They’re sturdier, more forgiving of background noise, and a reliable choice for most home setups.
- Condenser microphones are more sensitive and can record crisp and detailed sounds. However, this heightened sensitivity means they capture even the faintest ambient noise, so they work only in very quiet sound-treated environments.
- USB microphones connect directly to your computer, meaning they are extremely easy to use. They are simple, affordable, and perfect for beginners.
- XLR microphones have to be connected to a mixer or audio interface which is connected to your computer. This means you need more equipment on hand. These are often the best option when you have multiple in-person hosts or guests because you are able to toggle audio levels directly during the recording.
You’ll also want to consider the polar pattern which is where a mic picks sound from. For podcasts, cardioid microphones tend to be best. They pick up noise from the front so they capture less ambient noise and can handle high volumes without distortion.
You can check our full list of the best podcast mics. But, here are the microphones I recommend, based on different budgets and recording needs:
Budget & Mid-Range
- Samson Q2U -$70, Hybrid XLR/USB, meaning it is versatile. Comes as a pack with microphone accessories.
- RØDE PodMic - $99, XLR, Dynamic
- Shure MV6 - $170, USB, Dynamic
- Audio Technica AT2035PK - $159, XLR, Condenser
- Blue Yeti USB Microphone - $80, USB, Condenser
Professional
- Rode Procaster - $229, XLR, Dynamic
- Shure SM7dB - $439, XLR, Dynamic
- Earthworks Ethos - $1,099, XLR, Condenser
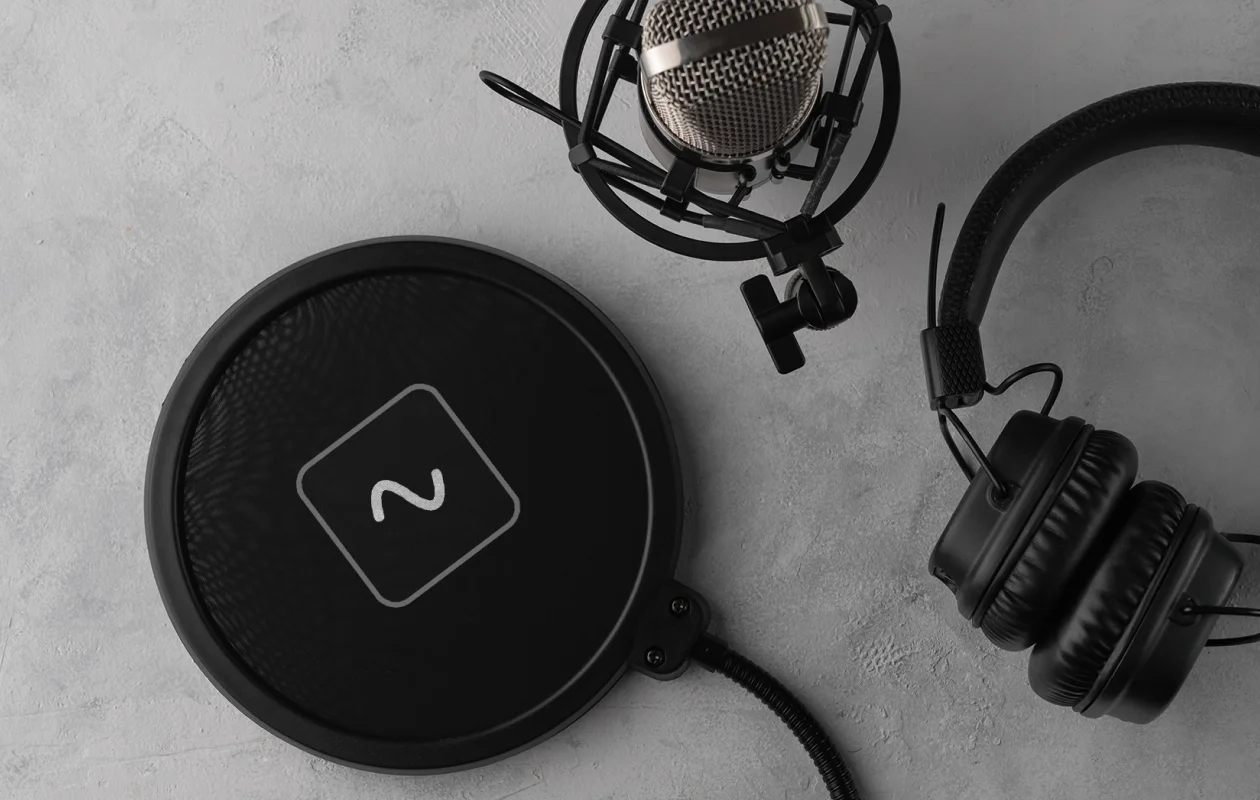
Headphones
.webp)
Recording with headphones is vital. They allow you to monitor your audio closely whilst also canceling out any interfering background noise.
There are two types of headphones: closed-back and open-back.
- Closed Back Headphones: optimal isolation with lesser sound quality. I prefer these for podcasting because they have minimal sound leakage.
- Open Back Headphones: optimal sound quality with lesser isolation.
Here are my best picks:
- Audio Technica ATH-M50x - $69, the best entry-level you can find.
- Skullcandy Icon ANC Wireless - $99, nice to avoid tripping yourself up with wires.
- Bose QuietComfort 35 - $199, you’ll be spending hours wearing these headphones, so you’ll definitely want them to be comfortable.
Cameras

If you're recording a video podcast, I recommend using a camera that can at least capture 1080p HD quality.
You have several options: you can use a webcam, a dedicated DSLR, or even your phone. If you’re starting out, a modern smartphone mounted on a tripod is probably the best solution for 1080p or 4K videos.
For a more professional and cinematic look, a dedicated camera is the way to go, but you’ll need a bigger budget.
Here are my best recommendations:
- Sony ZV-1 - $549, a portable and very reliable compact camera.
- Blackmagic Pocket Cinema Camera 4K - $1,295, a very powerful mirrorless camera designed for professional use.
More advanced podcast studio gear
If you’re recording with multiple, in-person guests or hosts, you might want to invest in more advanced gear to keep everything under control.
Audio interfaces
If you choose an XLR microphone, you’ll need to connect an audio interface to your computer to digitize the analog input. The Focusrite Vocaster Two ($249) is a simple and affordable 2-channel audio interface.
Mixers
A mixer does the same job as an audio interface but gives you more control by allowing you to alter the audio of each individual input. The RØDEcaster Pro II ($699) is a powerful, podcast-specific mixer that supports up to 4 inputs.
Video switchers
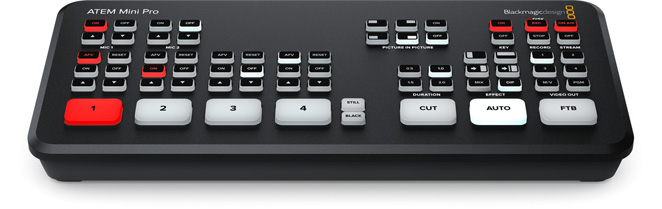
If you want to record with a multi-cam setup, you need a video switcher to switch between different camera angles live. It will save you a lot of time and effort during post-production.
The ATEM Mini Pro ($333) is the one I personally use in my podcast studio, and it’s a really solid option.
Accessories
Some nice extras you may want to include in your home podcasting studio are:
- Stands and boom arms: A boom arm can free up a lot of space on your desk and allow you to position your mic perfectly in front of your mouth.
- Stands, tripods, and shock mounts: A stand or tripod is great for keeping your microphone or camera stable and reducing vibrations and handling noise. If you want to take a step further in reducing noise interferences, add a shock mount too.
- Pop filter: A pop filter helps to reduce popping sounds like p’s or t’s, minimizing the risk of audio peaking and distorting.
- Desk workstation with a good chair: You may end up spending a lot of time editing in your home studio, so protect your back and stay comfortable!
- Cables: Make sure not to skimp on cables for your home studio, as cheaper ones can seriously compromise your audio quality.
- Headphone amplifiers: A small device that splits the headphone signal so multiple in-studio guests can each have their own pair of headphones with individual volume control.
- Decorations: I like to add warm lighting, wall art, plants, and a few personal items that make the room feel welcoming. Also, they look great on video.
Step 4: Set up lighting
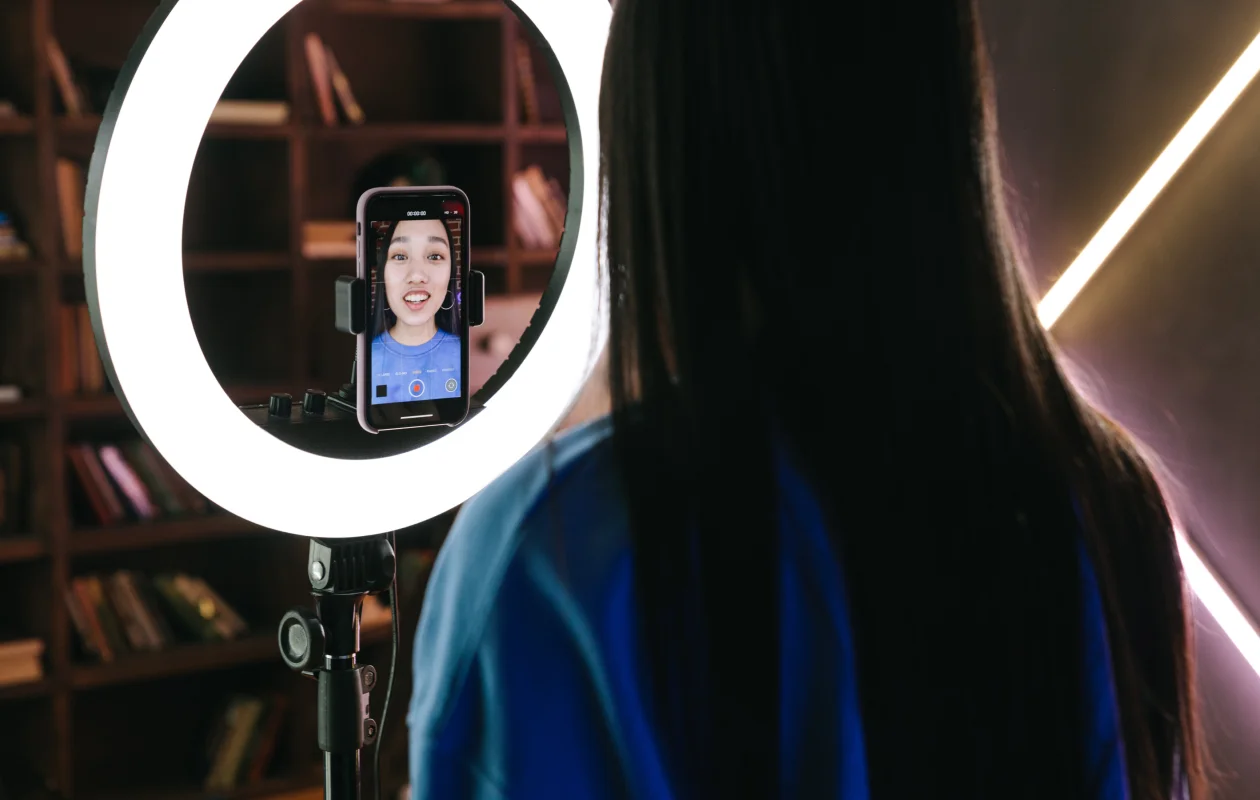
Lighting can make or break the quality of your video podcast. Even the best camera can’t save a poorly lit setting. The key is to use a diffused light to soften shadows and make you look sharper.
I recommend using three-point lighting since it's a simple but really effective setup. As the name implies, you need to have three different sources of light:
- Key light: This is your main and brightest light source. You can buy a simple LED ring light and place it at a 45-degree angle to one side of your face, or use a large window right in front of you.
- Fill light: This should be a less intense light that should be placed on the opposite side of your face to soften the shadows created by the key light.
- Backlight: The last light is placed behind you and points at your head and shoulders. It helps to separate you from the background, preventing your video from looking flat.
Read more: How to set up the best video lighting
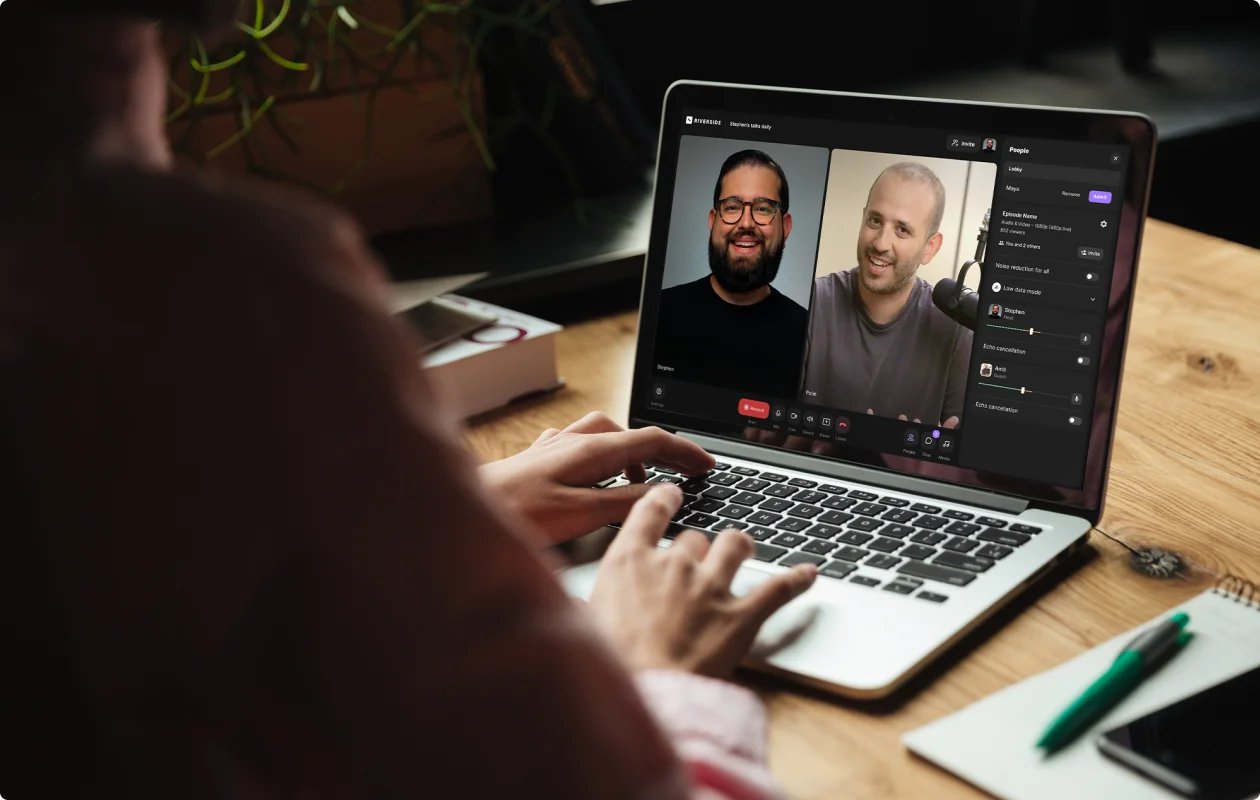
Step 5: Pick a podcasting software for recording and editing
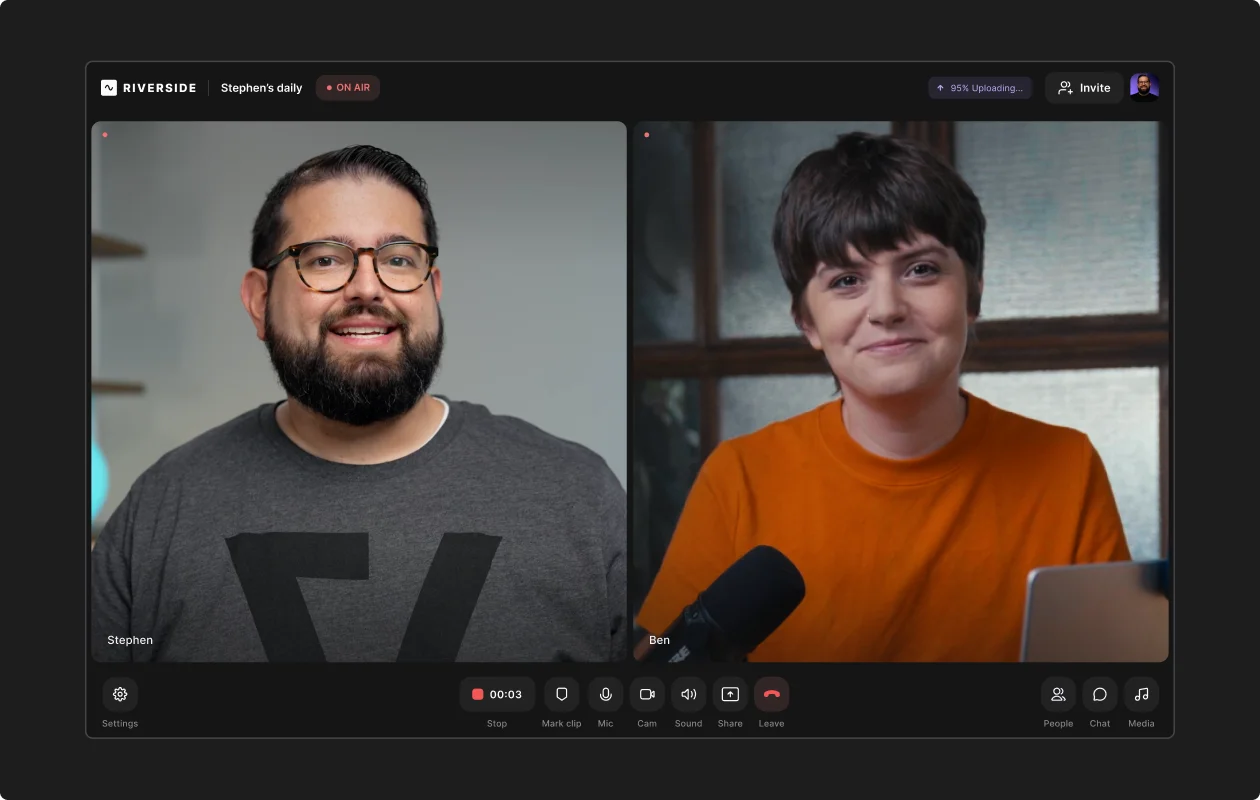
My best advice, especially if you’re a beginner, is to go with an all-in-one podcast software like Riverside. Instead of juggling separate tools and subscriptions, you can record, edit, and host your podcast on one platform.
With Riverside’s local recording, everything records directly to each person's device. And while recording, it uploads to the cloud. This means you get high-resolution files without worrying about your internet connection. You’ll also get separate audio and video tracks, making it easier to edit and cut crosstalk.
Editing is a breeze with Riverside. With text-based editing, you can edit your recording like a doc. Any changes you make in your transcript update in your actual recording. And with automated tools, it just takes a few clicks to clean up audio. Enhance your audio, clean up pauses, silences, and filler words, and remove background noise with the help of AI.
You also have an array of options to customize your video with text overlays, music, b-roll, captions, and more.
If you’re working with more specialized setups, like, like in-person, multi-cam shoots, or radio interviews, there are some other tools you might want to consider:
- Audacity: Good if you have no budget, Audacity is a free DAW which works with all operating systems, although it lacks the option for multi-track recording.
- Hindenburg Journalist: Professional and very advanced software designed specifically for broadcasting and radio. The basic version is priced $99 but multitrack recording is only available in the pro version.
- OBS Studio: Free and open-source software best known for live streaming, but it’s also excellent for in-person recording, especially with multi-cam setups.
Considerations for different podcasting setups
Your ideal setup depends on your podcast’s format. Here’s how I adapt mine for different scenarios:
Remote podcast studio setup
A remote setup is the simplest since you’re only managing your own gear. Even lighting is simple when you’re the only one in the spotlight. A standard three-point lighting kit will do.
The real challenge is your guest’s equipment and internet connection. That’s why I use Riverside, which records each person locally and uploads in the background. This way, you can avoid internet issues and clean up background noise with AI by just clicking a button.
Your guests can also join directly from their phones, which often is the best camera they have at hand.
In-person podcast setup
When you have two or more people in the same room, you need to manage multiple microphones and headphones. This means an audio interface or mixer is non-negotiable. To prevent audio from one person's mic from bleeding into another's, I prefer dynamic microphones because they pick up less room sound.
Lastly, choose software that can record each channel separately right from the start. OBS Studio is great here, especially if you’re also capturing video.
Live streaming podcast setup
With live streaming, there are no second chances. You need everything right the first time. Internet stability is critical here, so I always use a wired ethernet connection with high-end cables instead of Wi-Fi.
Riverside helps with live streaming too, offering built-in multistreaming and Producer Mode, so a team member can handle technical controls while you focus on hosting.
Optimizing your podcast studio setup: 5 Tips
Keep cables and gear organized: Loose cables create noise (literally and visually). I use cable ties and clips to keep my studio neat and tidy.
Don’t save on comfort: You'll be spending a lot of time in your studio, so make sure your chair doesn’t just look cool but it’s comfortable and ergonomic. Did you know good posture can even improve your vocal delivery?
Mic placement counts as much as mic quality: Even a great microphone can sound bad if it’s too far away or too close. I keep mine one fist-width away from my mouth and slightly off-center to reduce plosives.
Look for a quiet space: I always pick the quietest room in the house, away from street noise and household activity. Not just for sound quality, but to avoid distractions that could ruin a recording.
Test before you record: I always run a quick test recording to check audio levels, lighting, video quality and framing. Fixing issues early saves hours later. With Riverside, you can instantly delete a take you don’t like. No saving, no file clutter.
FAQs on Podcast Studios
How much does it cost to set up a podcast studio?
The cost of a podcast studio can range from (nearly) $0 to several thousand dollars. It all depends on the level of quality and complexity you need. If you start with a basic USB mic, headphones, free software, and your smartphone camera, you can easily stay under $100.
If you want a more professional rig with an audio interface, video switcher, 3-point lighting, XLR mics, sound treatment, and accessories, expect to spend upwards of $1,000.
How big does a podcast studio need to be?
A podcast studio doesn't need to be large. As a matter of fact, a smaller, quieter room is preferable to reduce echo and reverb.
You must take the space for your recording equipment into consideration, especially if you’re recording with multiple in-person guests. A room around 6x8 feet (5 sq meters) is usually sufficient for one or two people.
What is the best room to record a podcast?
The best room to record a podcast is a small, quiet room with no distractions and plenty of soft surfaces (carpets, curtains, pillows) to absorb sound. A walk-in closet filled with clothes is technically the ideal room, even if it’s not the most comfortable one to record in. My best advice is to start in a spare bedroom, but if you don’t have any, a living room with carpets and soft furniture can absolutely do.
Do you need a studio to record a podcast?
No, you don't need to rent a professional recording studio. You can get excellent results at home. Still, you need to dedicate some space to recording
A dedicated space is great for ensuring consistency in your show, but I’ve recorded lots of great episodes from spare bedrooms and offices. To record a high-quality podcast, all you need is a good mic, solid mic technique, and reliable software like Riverside.


